
Moving a website to a new hosting provider or domain name feels intimidating for many site owners. You worry about losing blog posts, breaking page layouts, or watching Google search rankings drop.
Site relocation represents a normal step in growing an online business. Site owners move to gain faster loading speeds, upgraded security firewalls, lower operating costs, and staging access. Achieving a seamless website transfer requires a reliable WordPress migration checklist.
This step-by-step WordPress migration checklist guides you through preparing, transferring, testing, and optimizing your site.
What is a WordPress migration checklist?
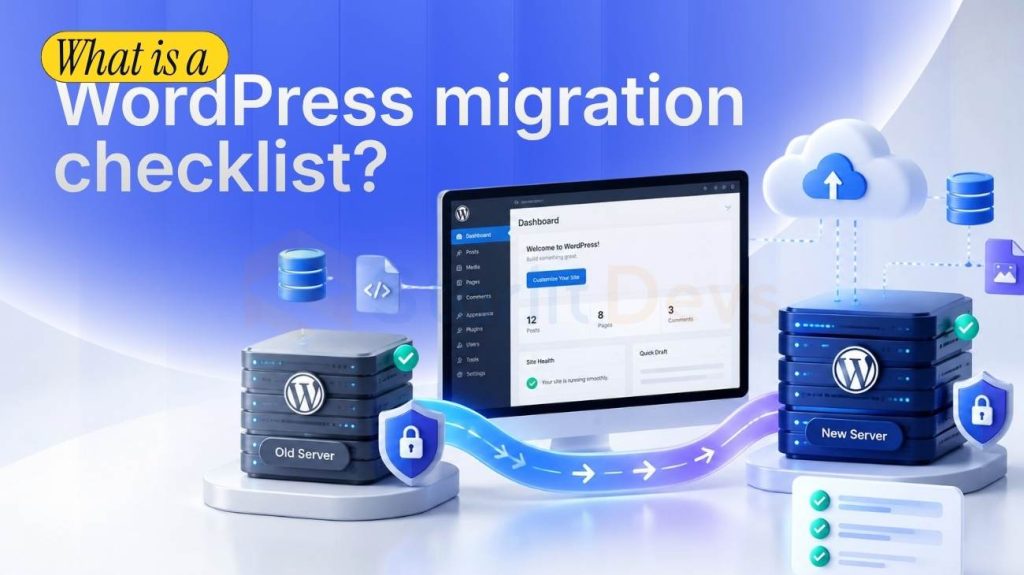
A WordPress migration checklist is an ordered list of tasks designed to move a WordPress site between web hosts or domain names without losing content, experiencing downtime, or hurting search rankings.
The migration process splits into three clear phases: pre-migration preparation, live execution, and post-migration verification. A full site move transfers four core assets: site files, MySQL database records, domain name settings, and server environment configurations.
Skipping any single asset breaks the website. A missing database leaves an empty site, missing media files show blank image boxes, and incorrect domain settings route visitors to an old server.
Website moves fall into four categories. A host change transfers your site to a new provider while keeping your existing web address. A domain change updates your brand name and changes every URL, requiring a redirect map and Search Console update. A staging move publishes a tested copy from a local development environment to a live server.
A platform change imports content from systems like Squarespace or Wix directly into WordPress.
How long does a WordPress migration take?
An automated plugin migration for a small website takes 15 to 30 minutes. A manual host transfer takes 1 to 3 hours. Large e-commerce stores, multisite networks, and complex sites with custom code require a full day or more. Domain Name System propagation adds waiting time. Most web visitors reach the new server within a few hours. Full global propagation takes 24 to 48 hours. Add this buffer to your WordPress migration checklist.

Phase 1: Pre-Migration Preparation
Proper preparation determines whether your site move succeeds. Complete every task on your WordPress migration checklist before altering active server settings.
1. Take a full backup and test the restore process
Never initiate a site move without a safety net. A WordPress site contains file system assets (themes, plugins, uploaded media) and relational MySQL database records (posts, pages, user accounts, settings).
Use UpdraftPlus, Duplicator, or All-in-One WP Migration to create an archive. Store a copy on secure cloud storage like Google Drive, Dropbox, or Amazon S3. Restoring the backup to a staging site verifies data integrity. Open the uploads folder inside your backup to confirm media files exist. A verified restore forms the foundational task on your WordPress migration checklist.
2. Gather logins and credentials
Collect credentials in advance and store details in an encrypted password manager. Your access inventory must include hosting control panel access, new hosting credentials, WordPress admin logins, domain registrar details, SFTP keys, database passwords, and email management access. Request missing logins from past developers prior to launch day.
3. Inventory plugins, themes, and content assets
List active plugins with version numbers and license types. Mark licenses tied to a single domain name. Record your active theme, child theme details, and outside integrations like payment gateways, customer databases, and email services.
Delete inactive plugins to lighten transfer size. Media libraries exceeding 5 GB alter file transfer methods. Databases containing over 10,000 comments slow down export operations.
4. Match PHP and database server versions
Version discrepancies between web servers cause post-migration errors. Check PHP and MySQL or MariaDB versions on both hosting environments. Legacy plugins fail on PHP 8 after running on PHP 7.4.
Align PHP versions on your staging environment first. Update WordPress core, themes, and plugins prior to transferring files.
5. Record your SEO baseline performance
Document pre-migration analytics to evaluate post-migration performance accurately. Export 90 days of Google Search Console performance data, including clicks, impressions, average positions, and top search queries.
Crawl your site using tools like Screaming Frog or Sitebulb. Save active URLs, meta titles, meta descriptions, canonical tags, and existing redirects. Note top 20 organic traffic pages, conversion rates, and Core Web Vitals metrics.
A baseline prevents mistaking normal traffic fluctuations for migration errors.
6. Select a low-traffic window and notify users
Review site analytics to identify quiet traffic hours. For global audiences, select low-traffic hours belonging to your largest market. Plan a maintenance window spanning 15 to 60 minutes. Email your audience 7 days ahead and again on migration day. Enable maintenance mode when final database copying begins.
7. Deactivate caching, security, and redirect plugins
Turn off caching plugins, security firewalls, and redirect management tools on your live site before copying files. Caching plugins serve outdated static pages during testing. Security firewalls block automated file copying scripts, resulting in 403 or 500 server errors. Turn these plugins back on after verifying the new server.
8. Set up a staging copy on the new host
A staging site provides a private sandbox on your new hosting server. Rehearse the transfer on staging before updating public settings. Platforms like InstaWP allow rapid staging creation. Check key pages, submit forms, and run test orders inside staging. Enable the option to discourage search engines on staging. Including staging on your WordPress migration checklist guarantees a clean launch.
Phase 2: Choosing Your Migration Method
Select your transfer methodology based on technical skill, site size, and downtime limits. Your WordPress migration checklist accommodates three primary approaches.
Option A: Automated migration plugins
Automated plugins package site files and database records into downloadable archives for direct import on a fresh WordPress setup.
- UpdraftPlus: Restores site backups directly onto target hosting destinations.
- Duplicator: Creates a two-file package featuring an automated setup installer wizard.
- All-in-One WP Migration: Exports complete site setups with single-click import capabilities.
- InstaWP Connect: Links staging copies directly to live hosting environments.
Plugin migrations complete within 15 to 30 minutes for small to midsize websites. Select tools capable of handling serialized data structures safely. Following this path inside your WordPress migration checklist simplifies site transfers.
Option B: Managed host migration services
Many web hosting companies provide migration services for new clients. Hosting support technicians handle file transfers and database imports behind the scenes. You supply existing account credentials and review the final result. Confirm in writing what the hosting provider includes. Free hosting migrations frequently omit email setup, DNS adjustments, and redirect mapping.
Option C: Manual file and database transfers
Manual transfers use SFTP, command line SSH, database exports via phpMyAdmin, and configuration edits. Manual moves require 1 to 3 hours and higher technical comfort. Manual transfers become essential under specific conditions:
- Database size exceeds 1 GB
- Media uploads folder exceeds 5 GB
- The website runs a multisite network or headless WordPress architecture
- The project requires under 15 minutes of total downtime
Automated plugins often time out when handling large data volumes, making manual transfers necessary on your WordPress migration checklist.
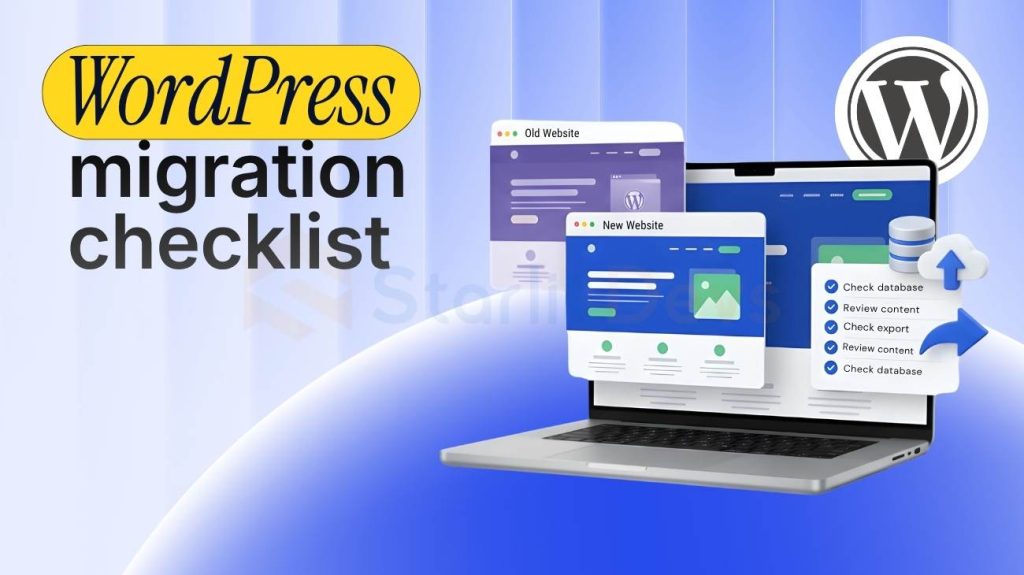
Phase 3: Core Step-by-Step Migration Execution
Follow this sequential roadmap during active transfer operations. Complete each action on your WordPress migration checklist before proceeding.
1. Copy website files and import the MySQL database
Halt new post publishing, place the live site into maintenance mode, and take a final backup. Copy core files, theme templates, active plugins, and the uploads directory using SFTP. Use rsync command-line tools for fast directory copying when handling large media folders. Create a fresh MySQL database and database user inside your new hosting panel. Import your exported SQL database file. Large database files import reliably through command line SSH rather than browser interfaces.
2. Update database credentials in wp-config.php
Open wp-config.php on your new server host. Enter the new database name, database username, password, and database host location. Ensure the table prefix matches your imported database tables. Generate fresh security authentication keys from the official WordPress API and replace old keys inside wp-config.php.
3. Run a serialized-safe search and replace operation
WordPress stores site settings, widget layouts, and menu options inside serialized data arrays. Plain text find-and-replace edits corrupt serialized data, breaking theme styling and navigation. Use tools like WP-CLI, specialized migration plugins, or dedicated serialized-safe scripts to replace old domain URLs or directory paths. Run a dry run first to verify expected URL changes before committing updates.
4. Refresh permalinks and rewrite rules
Open your WordPress administrative dashboard on the new server. Navigate to Settings, click Permalinks, and click Save Changes. This action flushes rewrite rules, fixing 404 page errors instantly across post URLs. Adding this task to your WordPress migration checklist prevents broken page links.
5. Preview the site locally prior to DNS changes
Test your site on the new server host without exposing changes to public visitors. Edit the local hosts file on your computer, mapping your domain name directly to the new server IP address. Open your browser to inspect layout formatting, navigation menus, media galleries, and admin dashboard functionality. Fix identified issues while public visitors continue reaching the old server. Remove local hosts file edits after testing completes.
6. Update domain DNS records
Point public traffic to your new hosting server by editing domain DNS records inside your domain registrar account. Update your domain A record, and AAAA record if active, to reflect the new server IP address. Use online DNS lookup checkers to monitor global propagation progress. Keep the old hosting server active, as global DNS updates require up to 48 hours to complete fully. Executing DNS updates marks a key milestone on your WordPress migration checklist.

Phase 4: Post-Migration Quality Assurance and Testing
Completing the live DNS switchover leads into post-migration verification. Systematic quality checks on your WordPress migration checklist ensure every feature functions correctly.
1. Conduct functional testing across user touchpoints
Test critical interactive elements across desktop and mobile displays:
- Contact forms: Fill out and submit contact forms to confirm email notifications arrive in your inbox.
- E-commerce checkout: Run sandbox transactions from cart selection to order confirmation.
- User authentication: Log into administrative accounts and member portals to verify access permissions.
- Media assets: Spot check blog posts to verify photos, videos, and downloadable files load promptly.
2. Track visual layout bugs collaboratively
Catching visual alignment glitches quickly simplifies team corrections. Using visual feedback tools like Marker.io allows team members to click layout elements, attach detailed notes, and submit visual bug reports directly to developers. Visual tracking keeps design reviews organized on your WordPress migration checklist.
3. Validate HTTPS security and SSL certificates
Ensure your new hosting provider issues an active SSL security certificate. Access your site using HTTPS to verify browser padlock icons. Scan pages for mixed content errors caused by scripts or images loading over unencrypted HTTP links. Fix mixed content using a database search and replace operation from HTTP to HTTPS.
4. Measure performance and Core Web Vitals
Run PageSpeed Insights tests on key page layouts. Compare Largest Contentful Paint, Interaction to Next Paint, and Cumulative Layout Shift metrics against pre-migration baseline scores. Google considers Cumulative Layout Shift scores of 0.1 or lower optimal.
5. Re-enable caching, security, and CDN services
Turn caching plugins, firewall security rules, and content delivery network layers back on. Flush temporary server caches to ensure visitors receive fresh web pages.
6. Re-crawl the live website
Run a fresh site crawl using Screaming Frog or Sitebulb. Compare URL lists, page titles, canonical tags, and status codes against pre-migration crawl records. Identify and fix 404 page errors, redirect loops, or redirect chains within 48 hours.
7. Update search console properties and tracking
Verify your new domain property inside Google Search Console if your site address changed. Use the Google Search Console Change of Address tool for domain name modifications. Submit your updated XML sitemap to Google Search Console and Bing Webmaster Tools. Inspect real-time analytics reports to verify tracking tags fire correctly.
8. Monitor traffic and retain old hosting
Monitor website analytics and Search Console performance reports daily for 7 days. A minor traffic dip during the first 2 days remains normal, followed by a rebound within 3 to 5 days. Keep your old hosting account live for at least 14 days post-migration. Retaining the old server protects data if latent issues emerge during DNS settling. Closing these items completes your core WordPress migration checklist.
Phase 5: The 9 Essential Migration Steps Most Guides Skip
Standard guides focus on core file copying while ignoring hosting infrastructure details. Incorporating these 9 frequently skipped steps into your WordPress migration checklist prevents downtime, lost revenue, and search traffic drops.
1. Construct a 301 redirect map
Changing URL permalinks or moving domains requires permanent 301 redirects to preserve search ranking authority. Export old URLs into a spreadsheet, matching each address with its target URL. Implement 301 redirects inside server configurations or redirect plugins. Avoid 302 temporary redirects, as search engines do not transfer link equity across temporary redirects.
Test redirects using curl command line checks to confirm old URLs return 301 status headers pointing to 200 success destinations. Google recommends maintaining active domain redirects for at least 180 days. Mark redirect mapping complete on your WordPress migration checklist.
2. Lower DNS TTL values in advance
DNS Time to Live (TTL) dictates how long DNS servers cache domain records. Lower your domain TTL setting to 300 seconds 24 to 48 hours before starting your migration. Lowering TTL forces DNS resolvers to check for updated IP addresses every 5 minutes.
When you update A records on launch day, global traffic switches to your new server within minutes. Restore original TTL settings after testing completes.
3. Establish a formal rollback strategy
Unforeseen server failures demand a written recovery procedure. Define failure criteria in advance, such as persistent 500 server errors or database import corruption exceeding a 30-minute troubleshooting threshold.
Designate a single decision maker authorized to call a rollback. If critical failures occur, point domain DNS records back to the original server.
Keeping the old server untouched during migration ensures immediate recovery. Place the rollback procedure at the top of your WordPress migration checklist.
4. Transfer email accounts and mail server records
Website files and business email mailboxes often reside on the same server account. Changing hosting providers without configuring mail records disrupts email delivery. Recreate email accounts on your new hosting server prior to switching DNS settings.
If you use cloud mail providers like Google Workspace or Microsoft 365, copy all DNS mail records (MX, SPF, DKIM, DMARC) to your new DNS zone. Test sending and receiving emails through Gmail and Outlook after launch, verifying SPF and DKIM authentication passes.
Update SMTP plugin settings inside WordPress to ensure transactional site emails send successfully. Give email verification its own line on your WordPress migration checklist.
5. Audit domain-bound plugin licenses
Certain premium WordPress plugins bind software license keys to a specific domain name. Changing domain names causes these plugins to lose update capabilities or disable premium functions. Review your plugin inventory to identify domain-restricted software. Deactivate license keys on your old domain name prior to migration, then reactivate licenses on the target domain following transfer.
6. Recreate server cron jobs and scheduled tasks
WordPress relies on WP Cron to trigger scheduled tasks, including scheduled post publishing, automated backups, email distribution, and subscription renewals.
High-traffic websites often disable default WP Cron execution in wp-config.php, relying on server-level cron jobs configured inside hosting panels. Server cron jobs do not transfer automatically with site files.
Recreate server cron jobs inside your new hosting control panel to maintain automated background tasks.
7. Update IP address allowlists across external services
Your new web host assigns a new server IP address to your site. Security firewalls, payment gateways, third-party APIs, remote databases, and SMTP relays frequently restrict incoming connections to allowlisted IP addresses.
Send your new server IP address to service providers prior to migration. Update origin server IP settings inside your content delivery network and web application firewalls, testing each external service post-migration.
8. Safeguard e-commerce orders and form submissions
DNS propagation requires up to 48 hours, meaning some visitors reach the old server while others see the new server. Orders placed or forms submitted on the old server during this window do not appear in your new database.
Schedule migrations during minimum order volume hours. Pause checkout functionality on the old site, take a final database export, import data to the new server, and update DNS records. Check the old database post-migration for late form submissions or customer purchases, copying missing records manually.
Add a checkout pause to your WordPress migration checklist.
9. Recheck cookie consent banners and analytics tracking
Cookie consent management banners and analytics data streams bind configurations to specific domain URLs. Following a domain move, update domain configurations inside your consent management platform and analytics accounts.
Confirm consent banners display correctly before tracking scripts execute, maintaining GDPR compliance for European visitors. Including these 9 steps transforms any standard WordPress migration checklist into an enterprise safeguard.

Phase 6: Special Considerations for WooCommerce Stores and Membership Websites
Online stores and membership portals introduce database complexity during migrations. Customer orders, user profiles, and recurring subscriptions write continuously to relational database tables. A WooCommerce WordPress migration checklist requires extra line items.
For WooCommerce stores, compare database table counts between source and target environments to confirm custom tables transferred. Update payment gateway webhook endpoint URLs inside merchant accounts. Recheck automated tax calculation settings and shipping zone rules. Execute sandbox transactions covering product purchases, refund processing, and recurring subscription renewals. Freeze inventory modifications during file copying to prevent stock count discrepancies.
For membership websites, verify access permissions across user account tiers. Test user authentication flows by logging in as a free subscriber, paid tier member, and expired account user. Confirm restricted page content displays according to user account levels. Tailoring your WordPress migration checklist for membership sites prevents access disruption.
Phase 7: Master WordPress Migration Timeline Schedule
Executing a successful site move requires scheduling tasks across a structured timeline. Add this timeline to your WordPress migration checklist calendar.
- Email site users regarding scheduled maintenance
- Record your SEO performance baseline and run full site crawls
- Complete plugin, theme, and integration inventories
- Build a staging environment on the new host
- Lower domain DNS TTL settings to 300 seconds
- Execute a backup restore test on staging
- Provide your new server IP address to services requiring IP allowlisting
- Generate a final backup of site files and database records
- Enable website maintenance mode
- Pause e-commerce checkout operations
- Copy site files and import MySQL database records
- Update wp-config.php and execute serialized-safe search and replace operations
- Preview new site layouts via local computer hosts file edits
- Point domain DNS A records to the new server IP address
- Perform functional testing across contact forms, checkout flows, and SSL security
- Submit updated XML sitemaps to Google Search Console and Bing Webmaster Tools
- Run a site crawl and compare results against pre-migration baseline data
- Evaluate search engine rankings and traffic analytics against baseline figures
- Restore original DNS TTL settings
- Cancel old hosting accounts after traffic and order volume stabilize
- Remove domain redirects only after search engine indexing stabilizes completely
Phase 8: Troubleshooting Common Migration Errors
Addressing technical glitches promptly keeps your website migration on track. Keep these solutions inside your WordPress migration checklist as a quick reference guide.
- White Screen of Death: Indicates PHP memory exhaustion, version mismatches, or plugin conflicts. Access your server via SFTP and rename the plugins folder to temporarily disable plugins. Reactivate plugins individually to isolate offending software.
- Database connection error: Caused by incorrect database credentials in wp-config.php. Verify database name, username, password, and host values inside your hosting panel.
- Mixed content warnings: Occur when media files or scripts load over unencrypted HTTP protocols. Run a database search and replace operation converting HTTP links to HTTPS, then clear server caches.
- Missing media images: Results from incomplete uploads directory transfers. Recopy the uploads folder using SFTP or rsync, verifying server file permissions.
- 404 errors on internal pages: Occurs when permalink rewrite rules require refreshing. Open WordPress Settings, click Permalinks, and click Save Changes to fix routing.

Frequently Asked Questions
What should a WordPress migration checklist include?
A WordPress migration checklist must include a tested backup, access credentials inventory, plugin and service audits, PHP version matching, SEO baselines, staging rehearsals, a 301 redirect map, DNS TTL adjustments, email record transfers, rollback strategies, and 7 days of daily monitoring.
Does migrating a WordPress site hurt SEO rankings?
A host migration retaining identical URL structures does not harm search rankings when following a WordPress migration checklist. Domain or permalink changes experience temporary ranking dips if redirects are omitted. Expect minor traffic fluctuations for 1 to 2 days, with rankings rebounding within 3 to 5 days.
Should you use a migration plugin or move manually?
Use automated plugins for small to midsize websites featuring standard configurations. Choose manual transfers when database sizes exceed 1 GB, uploads folders exceed 5 GB, or when moving multisite or headless WordPress setups.
How long should you keep your old hosting account active?
Retain your old hosting account for at least 14 days following migration. Keep domain 301 redirects active for at least 180 days.
Is zero downtime achievable during a site move?
Near zero downtime is achievable. Build and test your site on staging, preview layouts using local hosts file edits, lower DNS TTL settings, execute final database syncs, and update DNS records. Visitors reach the old server until DNS updates propagate seamlessly.
Following this comprehensive WordPress migration checklist protects site data, maintains search traffic, and executes a hassle-free website migration.

Founding Starlit Devs has allowed us to extend our expertise globally, serving over 500 clients, including Fortune 1000 companies, with custom web development services. Our commitment to delivering exceptional design and development is coupled with a deep understanding of SEO, which has been pivotal in empowering businesses to achieve maximum online engagement and brand growth. At Starlit Devs, we take pride in our mission to provide websites that stand out in a competitive digital landscape and drive tangible results for our clients.
